Rhizome Division Explained
Division produces a complete, independent plant in a single operation. You cut through the rhizome, allow the cut surfaces to callus for 24–48 hours, and repot. Both the parent and the new division recover within 6–12 weeks. For variegated varieties like Laurentii, it is the only propagation method that preserves the yellow margins — leaf cuttings cannot transmit chimeral variegation, and most growers who try eventually discover this the hard way.
This guide covers sansevieria rhizome division specifically: what the rhizome is and why dividing it works, how to find the right cut point, the exact steps, what to expect during recovery, and what the biology is doing underground during the weeks when nothing seems to be happening.
TL;DR: Take the plant out of its pot, expose the rhizome, find the section between two leaf clusters, make one clean cut with a sterilised blade, allow both cut surfaces to dry for 24–48 hours, then repot in dry cactus mix and do not water for 5–7 days. Both sections will produce new leaves within 6–12 weeks.
What a Sansevieria Rhizome Actually Is
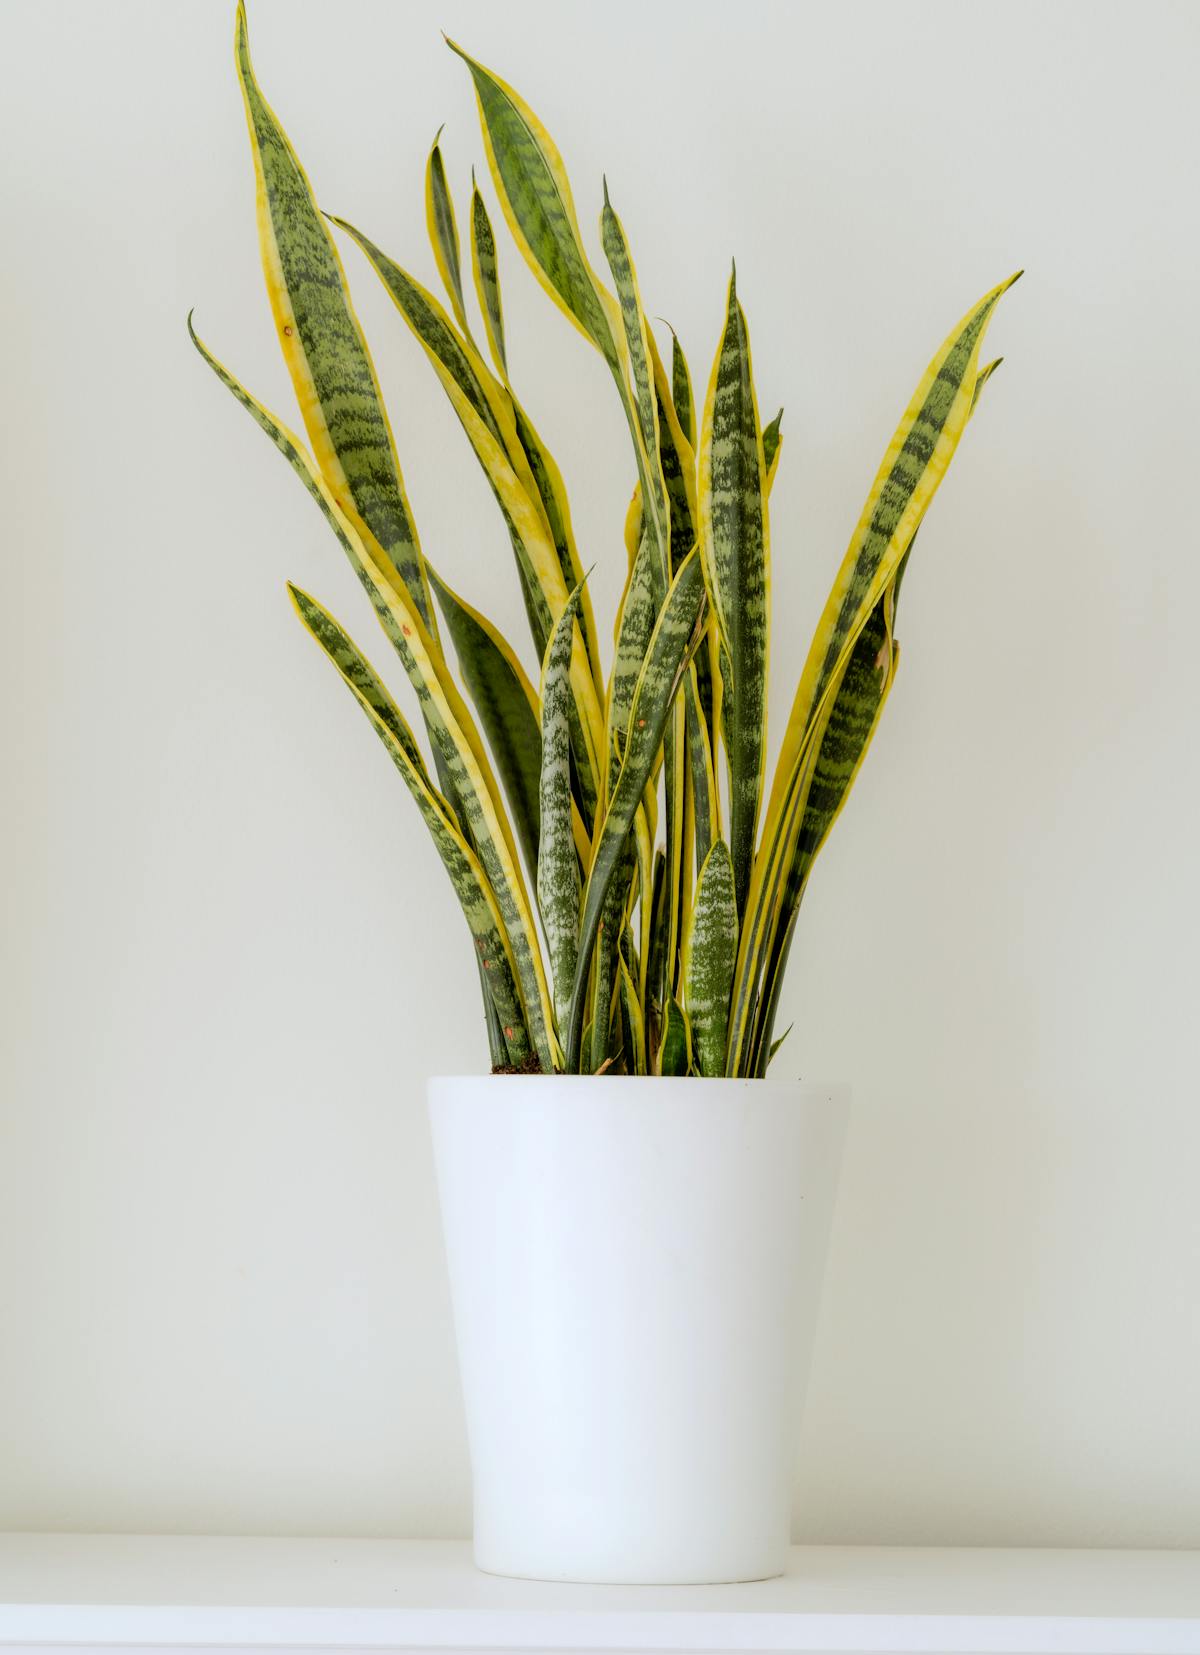
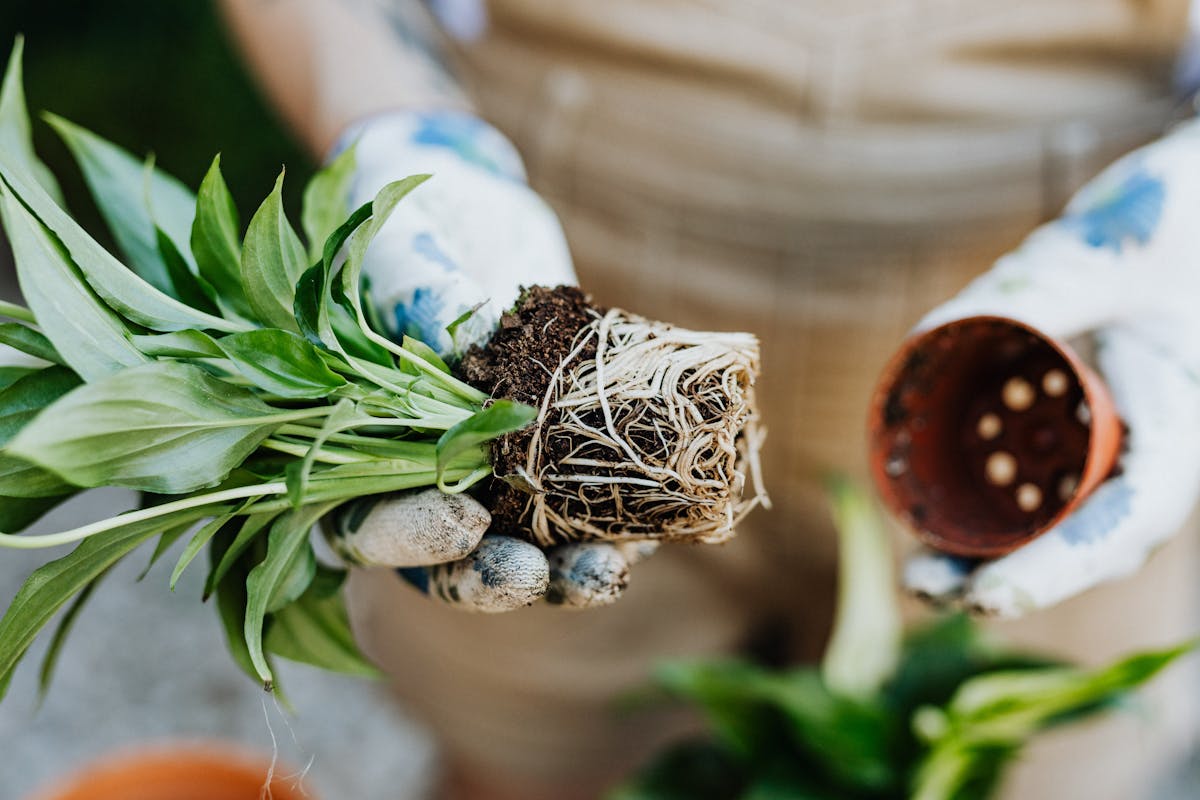
The rhizome is the horizontal underground stem that connects all the leaf clusters visible above the soil. It is a thick, fleshy, orange-brown structure — firm to the touch, like a compressed root — but structurally different from the roots growing downward from it. Roots absorb water and anchor the plant. The rhizome stores water and carbohydrates, produces roots downward, and generates new leaf clusters upward from its growing points. (For the full comparison — including why one is technically a stem and the other is not — see Snake Plant Roots vs Rhizomes: What Is the Difference?)
Every cluster of leaves emerges from a single growing point on the rhizome. As the rhizome expands horizontally through the soil, it generates new growing points ahead of the main cluster — this is how the plant spreads and gradually fills a pot over several years, eventually pressing against the walls hard enough to deform softer containers.
Understanding this structure changes how you approach division. You are not removing a root or trimming a leaf. You are separating one underground stem — which currently supports two or more independent leaf clusters — into two plants, each carrying its own root system, its own water and carbohydrate reserves, and its own capacity to generate new leaf clusters from its rhizome tissue.
A key practical point: a small, young plant with a single leaf cluster has not yet developed the rhizome structure to divide. Division requires a plant with at least two distinct leaf clusters and enough connecting rhizome between them to cut cleanly. If the plant is not there yet, leaf cuttings are the correct propagation route. The full structural picture — rhizome architecture, root anatomy, and how the underground system develops over time — is in the Sansevieria Morphology guide.
Why Division Preserves Variegation — and Leaf Cuttings Do Not
This is the primary reason experienced growers default to division for any plant with colour they want to preserve in the offspring.
Sansevieria Laurentii's yellow margin exists only in the L1 layer — an outer layer of meristematic cells inherited structurally, not through conventional cell division. A leaf cutting regenerates its pup from inner meristematic tissue, which does not carry the L1 layer, so the result is a solid-green plant every time. Division sidesteps the problem entirely: the new plant grows on from an existing section of rhizome that already carries the L1 layer through its own growing points, so the chimeral pattern continues unbroken.
The practical rule: divide for Laurentii, Moonshine, Futura, Robusta, or any variety with a colour pattern worth keeping. Leaf cuttings are fine for solid-green varieties where colour loss is not a concern. The full chimeral biology and a comparison of all four propagation methods is in the Sansevieria Propagation guide.
When to Divide
Spring and early summer give the best results in most indoor conditions. The plant enters its growing season with active root development and higher stored reserves in the rhizome. A division made in spring re-establishes its root system more quickly, and the wound from the cut heals faster in warmth.
Division in winter is possible but slower. Cold rooms — below 60°F/15°C — significantly reduce root development speed. A division that would establish in 8 weeks in spring may take 12–16 weeks in a cold room in January. If you divide in winter, keep both sections in a warm spot and expect the timeline to extend accordingly.
Two visible signals tell you the plant is ready for division:
Root pressure. Rhizome sections visibly pressing against or through the pot walls. Roots emerging from the drainage holes. The soil surface slightly lifting as the rhizome pushes upward. These signs mean the root system has genuinely outgrown the container. Division at this point does two things: it gives each resulting plant more room to operate, and it reduces the competition for resources between the clusters.
Multiple distinct clusters. When the plant has clearly grown two or more separate clusters of leaves — visible as distinct groups with open soil between them, not a single tight fan — the rhizome has developed the structure for a clean division. Each resulting section needs its own leaf cluster and its own root-bearing rhizome section with enough mass to callus properly and sustain the leaves above it.
A word on frequency: sansevieria does not need dividing on a schedule. Some plants stay comfortably in the same pot for four to five years. The signals above are more reliable than any calendar rule. Do not divide a plant that does not show them simply because time has passed.
What You Need Before You Start
A sharp, clean blade. A knife with a rigid blade or a small pruning saw — not scissors or shears. The cut needs to pass through the rhizome in a single motion. A ragged cut leaves more crushed and torn tissue exposed, which gives soil bacteria and fungi more surface area to colonise before the callus forms. Sterilise the blade with rubbing alcohol before cutting and between plants. Allow it to dry before making contact.
Cactus or succulent mix, or a 50:50 blend of standard potting mix and perlite. Fresh and dry — do not pre-moisten before potting the division. The cut surfaces need to stay relatively dry during the first week in soil. Regular potting mix holds moisture too long around a newly divided rhizome. This is not a minor preference — excess soil moisture during the initial period is the primary mechanism by which otherwise healthy divisions rot before their roots can establish.
Two pots with drainage holes. One for the parent, one for the division. Size the division's pot to the division itself: 2–4 cm clearance around the root ball is enough. An oversized pot retains moisture the rootless or minimally-rooted division cannot utilise. The parent plant typically goes back into the same pot, or a slightly smaller one if the root ball has been significantly reduced by the division.
A tray or newspaper to work on. Division is messy — soil, roots, and broken rhizome fragments. Working over a surface makes it easier to see what you are doing and keep the cut surfaces clean.
Optional but useful: powdered cinnamon applied to the cut surfaces after the callusing period acts as a mild natural fungicide. Sulphur dust works similarly. Neither is required for a healthy plant with a proper callus.
How to Divide the Rhizome: Step by Step
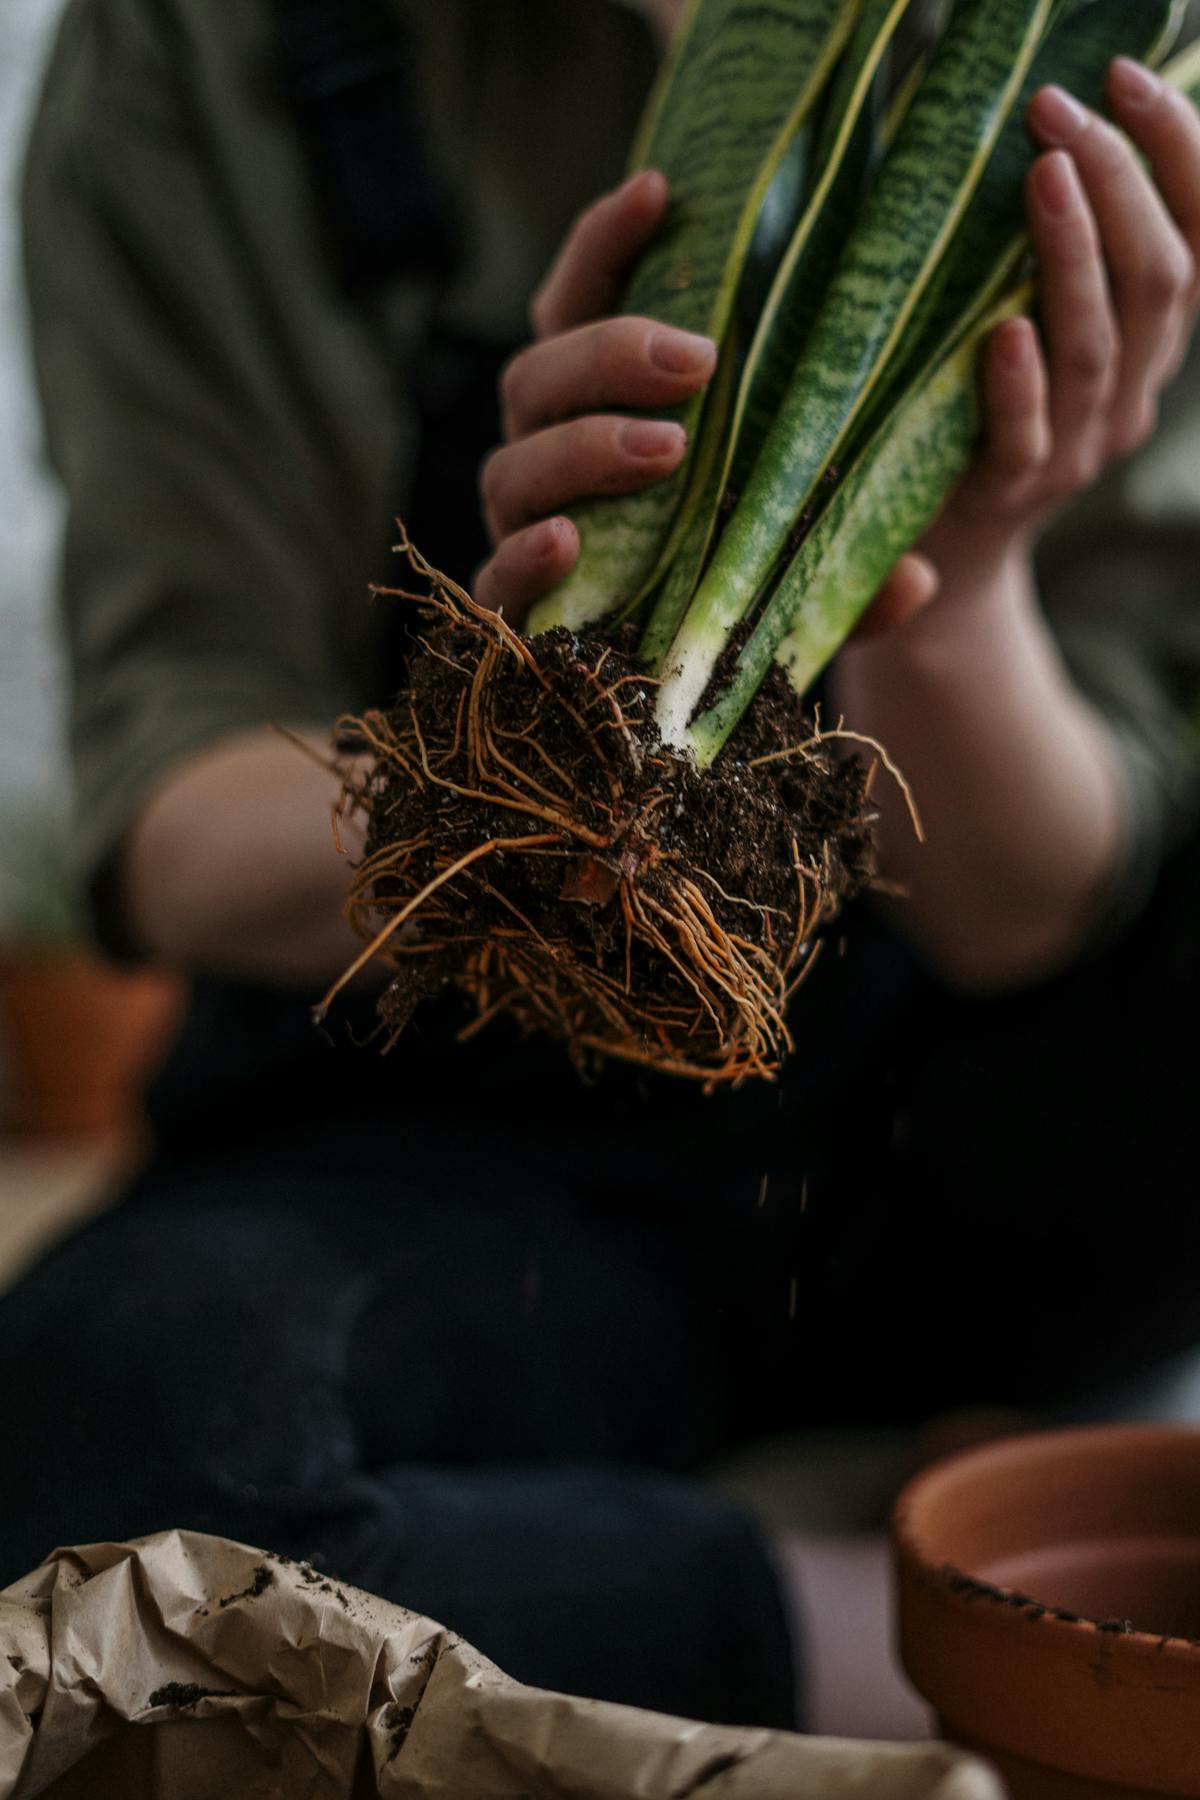
Step 1: Remove the plant from its pot. Lay the pot on its side and ease the plant out. If the plant is root-bound — which it often is if you are dividing because of pot pressure — press the sides of the pot to loosen the root ball, or run a knife around the inside edge. Do not pull the plant out by the leaves. The junction between leaf base and rhizome is the structural weak point and will tear before the root ball comes free.
Step 2: Expose the rhizome. Brush away enough soil to see the rhizome clearly. You do not need to remove every trace of soil from the roots — expose the rhizome itself, the horizontal orange-brown stem, and trace it to find where the leaf clusters attach. Working with gloves prevents soil irritation and keeps the cut surfaces clean.
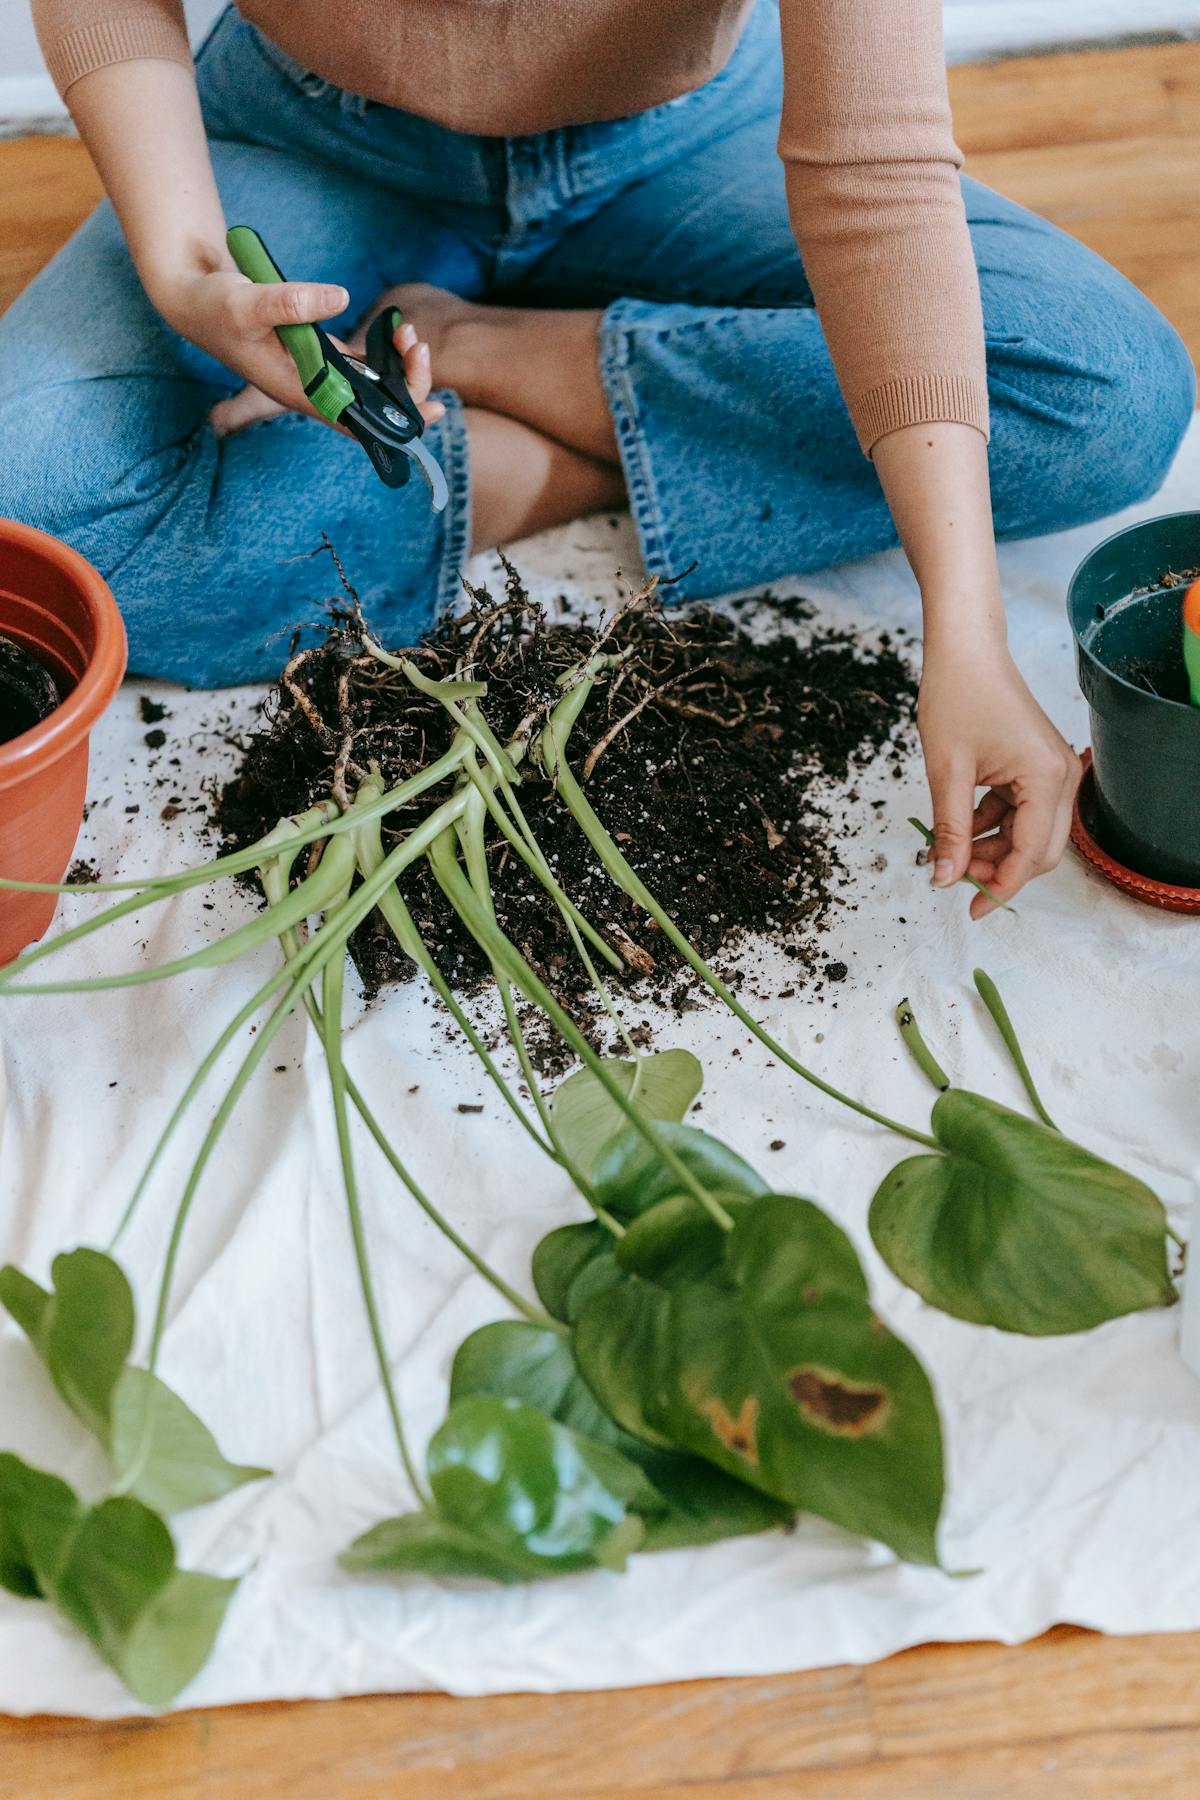
Step 3: Identify the cut point. Look at the rhizome as the connecting structure between the leaf clusters above it. Your cut goes between two clusters — on the section of rhizome that links them but carries no leaf bases of its own. The ideal cut point leaves at least 2–3 cm of rhizome on each side, giving both sections adequate tissue to form a good callus. Each resulting piece needs its own leaf cluster above and its own root section below.
Before you cut: assess the rhizome tissue. Healthy rhizome is firm and pale orange-white when cut through. Soft, dark, or mushy tissue anywhere on the rhizome indicates rot. If you find it, cut back until you reach consistently firm, pale tissue before potting either section. A division made from the healthy portion of a partially rotted rhizome can still succeed — but only if the rot is fully removed.
Step 4: Make the cut. A single, decisive, clean motion. One pass through the rhizome. For thick rhizomes on established plants, a small pruning saw makes a cleaner cut than a knife — less compression and tearing. The goal is the minimum of bruised tissue at the cut surface.
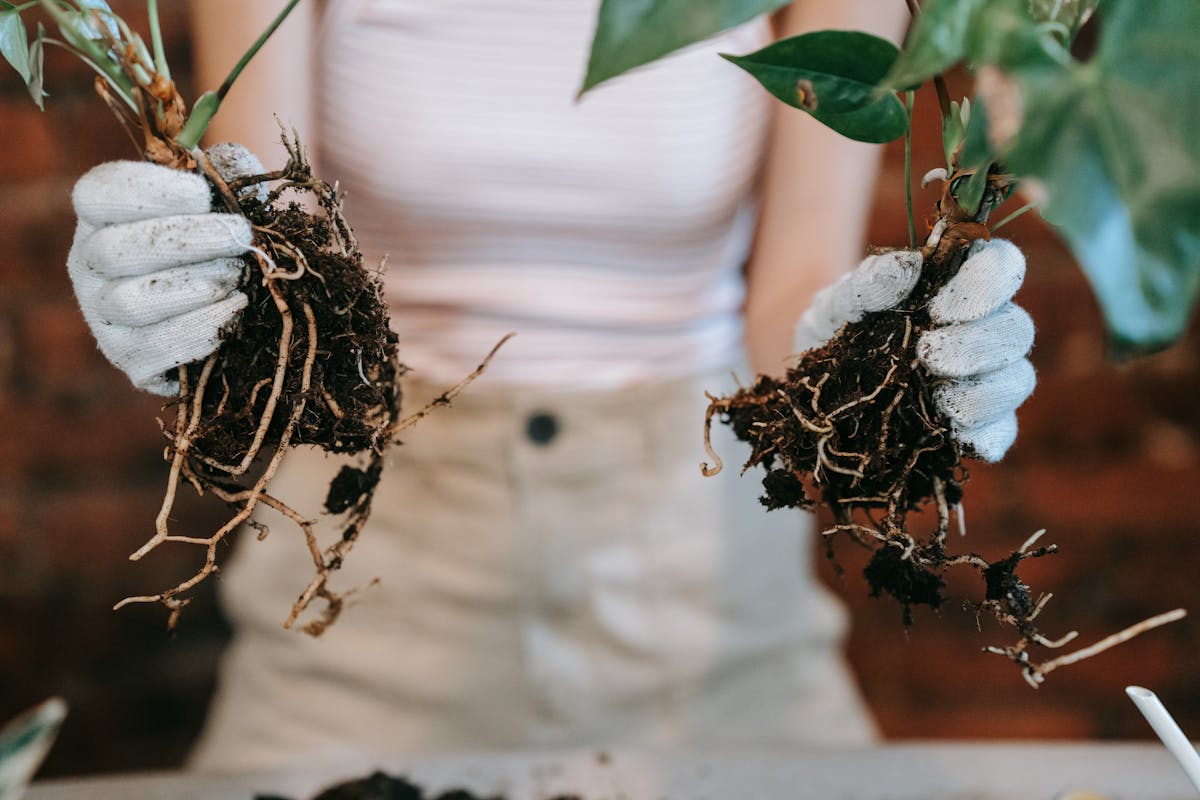
Step 5: Allow both cut surfaces to callus. Set both pieces — parent and division — in a dry location with good airflow, cut surfaces exposed to air. Wait 24–48 hours. The cut surface will form a dry, papery callus. This is not an optional step. Sansevieria rhizome tissue is vulnerable to soil bacteria and fungi until a callus seals the wound. A fresh cut surface in moist soil will begin rotting before the root system can establish. I have heard from multiple readers who lost a division in the first two weeks — in every case either the callusing step was skipped to save time, or the plant was watered immediately after potting.
Step 6: Pot both sections. Fill each pot with dry cactus mix — not pre-moistened. Set each rhizome section so it sits just below the soil surface with the roots pointing downward. The rhizome should be close to the surface, not buried at the base of the pot. Firm the soil gently around it. The division should be stable but not compressed — roots need airflow in the soil to develop correctly.
Step 7: Hold off watering. Do not water for 5–7 days after potting. The callus needs this additional dry period inside the soil before moisture is introduced. After the initial dry period, water lightly — dampen only the top 2–3 cm. Let the soil dry completely before the next watering. For the first two months, both sections need less frequent watering than a fully established plant, even though sansevieria in general tolerates drought well. The newly divided roots are more vulnerable than established ones.
What Happens After Division
For the first 4–8 weeks, neither the parent nor the division will show any visible change. The leaves on both will look exactly as they did the day you divided. This is the normal underground recovery phase, and it is where most people lose confidence in what they did.
What is actually happening: the cut surfaces complete their internal sealing. Existing roots re-establish their contact with the new soil. The rhizome begins activating dormant growth points — the axillary buds that were suppressed before division by apical dominance from the leading growing tip. Once those buds activate, new leaf growth follows.
The parent plant typically shows new growth first: 4–8 weeks after division in warm conditions above 65°F/18°C. It retains the larger root system and more of the original rhizome reserves.
The new division takes longer: 8–12 weeks is typical for the first new leaf to appear. If the division had fewer established roots than the parent, recovery is slower — but slower is not the same as failing.
One thing that catches new dividers off guard is what the existing leaves on the division do in the first few weeks. They may lose their full upright posture, look slightly duller, or feel marginally less firm than before. This is temporary water stress from the reduced root system. The division's roots cannot yet supply the leaves at the rate they were receiving from the larger pre-division root system. It normalises as roots re-establish. Do not respond by increasing watering frequency — the roots need the drying cycles between waterings to develop correctly.
The RHS guidance on sansevieria propagation confirms that division is the recommended method for preserving cultivar characteristics, with comparable recovery timelines: rhs.org.uk/plants/sansevieria/growing-guide. The NC State Extension's plant profile for Dracaena trifasciata lists division alongside stem cuttings as the primary propagation methods, and notes it specifically for cultivar accuracy: plants.ces.ncsu.edu/plants/dracaena-trifasciata.
The Biology: Why a Rhizome Section Becomes a Full Plant
What makes division more reliable than leaf cuttings is not just that it produces a larger starting structure — it is what the rhizome carries that a leaf section does not.
The rhizome contains meristematic cells: undifferentiated cells capable of producing any tissue the plant needs. The main growing tip of the rhizome is the primary generator of new leaf clusters. But along the length of the rhizome, there are also axillary buds — dormant growth points held in check by a hormonal mechanism called apical dominance. While the leading tip is active, it produces auxin that travels back through the rhizome and suppresses the lateral buds from activating.
When you divide the rhizome, you sever the connection that carries that suppression signal. The lateral buds on the remaining section are released from apical dominance. Those dormant growth points activate, begin differentiating, and start generating new leaf clusters. The new plant is not starting from scratch the way a leaf cutting must — it is releasing growth that was already cued up and waiting.
This is why a section of rhizome with no obvious growing tip can still produce new leaves. It is also why rhizome divisions tend to establish more vigorously than leaf-cutting pups once they take hold: the division begins with the full stored reserves of an established rhizome, not from the limited energy in a single leaf section. A leaf cutting produces one pup from its basal cells; a well-developed rhizome section can activate multiple axillary buds over time, eventually generating several independent leaf clusters from a single division.
The broader context of how this applies to all sansevieria propagation methods — and when to use each — is in the Sansevieria Propagation guide.
Troubleshooting: Why Divisions Fail
The division is rotting from the cut surface. The callusing step was skipped or shortened, or the soil was moist when potted, or the plant was watered too soon after potting. Remove the division, cut back to firm pale tissue, allow a full 48 hours to callus in dry air, and replant in completely dry cactus mix. Do not water for a full week after replanting.
No new leaves after three months. First, check whether roots have formed — tug the division gently. Resistance means roots are present; new leaf emergence follows root establishment by 4–6 weeks. If the division pulls out cleanly with no root resistance after 10 weeks, the rhizome has likely rotted internally from a wound not visible on the surface. Unpot and inspect. Cut back to firm tissue if any remains.
The division keeps falling over and will not stay upright. Normal — it has no root anchor yet. Prop it with a thin bamboo stake or rest it against the pot wall. Once roots establish and grip the soil, it supports itself. This is not a propagation failure.
Existing leaves on the division are yellowing. Normal if yellowing affects the older outer leaves during weeks 6–8 after division — the plant is reallocating resources from older tissue to support new growth. Not normal if yellowing is in the newest emerging leaves or spreading rapidly — inspect the rhizome base for soft tissue indicating rot at the cut site.
The parent plant has not produced any new growth after 10 weeks. Check light levels and room temperature before drawing conclusions. Cold conditions below 60°F/15°C and low light both slow recovery substantially. Moving the parent to a warmer, brighter position typically resolves this without any further intervention.
If the plant has been in the same pot for three or more years and the rhizome is pressing the walls: it is ready. Spring is the time to do it. Take it out, find the rhizome connection between the clusters, make one clean cut, and let it callus overnight. Both sections will recover. In two to three months, you will have two plants where you had one. The variegation in both will be intact.
Care FAQ
What is sansevieria rhizome division?
The rhizome is the horizontal underground stem that connects all of a sansevieria's leaf clusters. Rhizome division is the process of cutting this stem to create two independent plants, each with its own roots, leaf cluster, and stored reserves. Unlike leaf cutting propagation, division produces a fully structured plant immediately — not a pup that needs months to regenerate — and preserves chimeral variegation that leaf cuttings cannot transmit.
Does dividing a sansevieria harm the parent plant?
Division causes temporary stress — the parent plant loses part of its root system and rhizome reserves — but does not permanently harm a healthy plant. The parent typically shows new leaf growth within 4–8 weeks of division in spring or summer conditions. The most common post-division problem is rot from overwatering a fresh, uncallused cut surface. Follow the 24–48 hour callusing step and avoid watering for 5–7 days after potting, and the parent recovers reliably.
When is the best time to divide a sansevieria?
Spring or early summer, when the plant's growing season provides the best conditions for root re-establishment. Division in winter is possible but slower — cold rooms below 60°F/15°C extend the recovery timeline by 4–6 weeks. The visible signals that the plant is ready matter more than the calendar: a rhizome pressing against the pot walls, roots emerging from drainage holes, or two clearly distinct leaf clusters with enough connected rhizome to divide cleanly.
How do I find the right cut point on the rhizome?
Trace the rhizome from one leaf cluster to another. The cut point sits between them — a section of rhizome that connects the two clusters but carries no leaf bases of its own. Each resulting section needs its own leaf cluster and its own root-bearing section of rhizome. Healthy rhizome is firm and pale orange-white when cut. Soft or dark tissue indicates rot — cut back to firm, healthy tissue before potting either section.
How long until a divided sansevieria starts growing new leaves?
The parent plant typically shows new leaf growth 4–8 weeks after division in warm conditions above 65°F/18°C. The new division takes longer: 8–12 weeks is typical for the first new leaf to appear. Root re-establishment comes first, then new leaf emergence — usually 4–6 weeks apart. Nothing visible happens during the root phase, which is entirely normal. Do not discard a division before 10–12 weeks in warm conditions.
Why is my sansevieria division not growing after two months?
Two causes: root rot from a fresh cut surface planted in moist soil, or temperatures too cold for root development. Check by tugging gently — resistance means roots have formed and new leaves will follow. If the division pulls out with no resistance after 10 weeks, unpot and inspect the rhizome base for rot (soft, dark tissue). If rot is present, cut back to firm tissue, callus for 48 hours, and replant in dry mix. If the rhizome is healthy, move to a warmer, brighter position.